

Introduction
In this post, I'll present a practical approach to standardizing user authentication in a Next.js application, combining the next-auth library for OAuth 2.0 with React Email and Nodemailer for email-based account confirmation. This way, when a user registers a new account with an email and password, they will automatically receive an email to validate their account creation.
In this example, I'm using Next.js 15, Tailwind CSS 4, and the Shadcn/UI library to simplify component styling. However, to keep this article focused, I won't cover the installation of these technologies here.
React Email Installation
To install React Email, you can follow the official documentation that explains how to configure it for monorepo projects, as is the case for this Next.js application: https://react.email/docs/getting-started/monorepo-setup/npm.
Note: The official documentation forgot to mention the "npm init" command inside the folder where React Email is implemented. To simplify this step, I'm providing the link to my commit with this correction. It's worth mentioning that, in my structure, I made a slight modification: I used the lib folder instead of the packages folder.
Sending emails with Nodemailer and React Email
At this stage, we already have a simple user table that will be utilized in the server action covered in this topic. Install bcryptjs and nodemailer as project dependencies in the root folder.
Configure the following environment variables in your .env file:
1# db
2DATABASE_URL=""
3
4# email
5EMAIL_SERVER_HOST=""
6EMAIL_SERVER_PORT=""
7EMAIL_SERVER_FROM_ADDRESS=""
8EMAIL_SERVER_PASSWORD=""
9EMAIL_SERVER_NAME=""
Now, inside the lib folder, create a file called nodemailer.ts with the following content:
1import { createTransport } from "nodemailer";
2import { render } from "@react-email/render";
3import type { ReactElement } from "react";
4
5export const sendEmail = async (
6	to: string,
7	subject: string,
8	html: ReactElement,
9	text?: string,
10): Promise<void> => {
11	const transporter = createTransport({
12		host: process.env.EMAIL_SERVER_HOST,
13		port: Number(process.env.EMAIL_SERVER_PORT),
14		secure: true,
15		auth: {
16			user: process.env.EMAIL_SERVER_FROM_ADDRESS,
17			pass: process.env.EMAIL_SERVER_PASSWORD,
18		},
19	});
20
21	const jsxToHtml = await getHtml(html);
22
23	const response = await transporter.sendMail({
24		from: {
25			address: process.env.EMAIL_SERVER_FROM_ADDRESS || "",
26			name: process.env.EMAIL_SERVER_FROM_NAME || "",
27		},
28		to,
29		subject,
30		html: jsxToHtml,
31		text,
32	});
33
34	const failed = response.rejected.concat(response.pending).filter(Boolean);
35
36	if (failed.length) {
37		throw new Error(`Email(s) (${failed.join(", ")}) could not be sent.`);
38	}
39};
40
41const getHtml = async (element: ReactElement): Promise<string> => {
42	const html = await render(element);
43	return html;
44};
The file above is responsible for handling the email details, including the content, subject, and plain text version, as well as sending it to the specified recipient.
A file was created in the src/lib/react-email/transactional/emails folder to serve as the email content template used when sending emails to new users.
Also within the lib folder, a prisma.ts file was created to instantiate the Prisma client, along with another file named bcrypt.ts, which encapsulates the logic for hashing the password provided by the user during registration.
For better organization of these server actions, an "actions" folder was created inside "app", and in this example, it contains the following content:
1"use server";
2import { encryptPassword } from "@/lib/bcrypt";
3import { sendEmail } from "@/lib/nodemailer";
4import { prisma } from "@/lib/prisma";
5import WelcomeEmail from "@/lib/react-email/transactional/emails/WelcomeEmail";
6
7export interface RegisterUserData {
8 name: string;
9 email: string;
10 password: string;
11}
12
13export async function registerNewUser({
14 name,
15 email,
16 password,
17}: RegisterUserData) {
18 const userExists = await prisma.user.findFirst({
19 where: {
20 email,
21 },
22 });
23
24 if (userExists) {
25 throw new Error("User already exists!");
26 }
27 const hashedPassword = await encryptPassword(password);
28
29 await prisma.user.create({
30 data: {
31 name,
32 email,
33 password: hashedPassword,
34 },
35 });
36
37 const html = WelcomeEmail({ userFirstname: name.split(" ")[0] });
38 await sendEmail(email, "Welcome!", html);
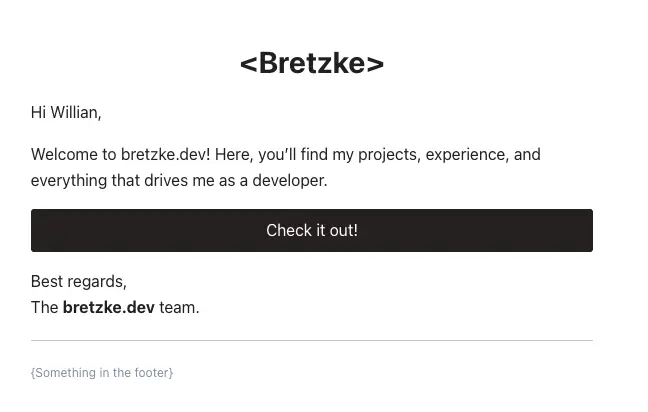
39}The function receives the values from the user registration form, the email is validated to ensure it hasn't been registered already, a new user is created with the hashed password, and finally, an email is sent using Nodemailer with a React Email template.
With this server action ready, you just need to call it on the client side:
async function handleSubmitForm(formValues: z.infer<typeof formSchema>) {
	await registerNewUser(formValues);
}
After it's processed, we will receive an email similar to this:
Implementing OAuth 2.0 with Next-Auth
To manage OAuth 2.0 authentication, we'll use a well-established framework for Next.js: Next-Auth. In this example, we'll implement OAuth 2.0 authentication specifically with Google OAuth.
This guide will not cover the full initial setup process. If you need detailed instructions on installing and configuring the library, I recommend following the official step-by-step guide in the documentation: https://next-auth.js.org/getting-started/example.
The file below is responsible for setting up Next-Auth, and it should be placed in the following location: src/app/api/auth/[...nextauth]/route.ts.
1import NextAuth from "next-auth";
2import GoogleProvider from "next-auth/providers/google";
3import CredentialsProvider from "next-auth/providers/credentials";
4import bcrypt from "bcryptjs";
5import { prisma } from "@/lib/prisma";
6import type { CustomAccount, CustomUser } from "@/@types/next-auth";
7
8interface SignInParams {
9	user: CustomUser;
10	account: CustomAccount;
11}
12
13export const authOptions = {
14	providers: [
15		GoogleProvider({
16			clientId: process.env.GOOGLE_OAUTH_CLIENT_ID as string,
17			clientSecret: process.env.GOOGLE_OAUTH_CLIENT_SECRET as string,
18		}),
19		CredentialsProvider({
20			name: "Credentials",
21			credentials: {
22				email: { label: "Email", type: "email" },
23				password: { label: "Password", type: "password" },
24			},
25			async authorize(credentials) {
26				const user = await prisma.user.findFirst({
27					where: {
28						email: credentials?.email,
29					},
30				});
31				if (!user) {
32					throw new Error("Invalid login credentials");
33				}
34
35				const isValidPassword = bcrypt.compare(
36					credentials?.password as string,
37					user.password,
38				);
39				if (!isValidPassword) {
40					throw new Error("Invalid login credentials");
41				}
42				return {
43					id: String(user.id),
44					name: user.name,
45					email: user.email,
46					image: user.avatar_url,
47				};
48			},
49		}),
50	],
51	session: {
52		strategy: "jwt",
53		maxAge: 60 * 60 * 24, // 1 day
54	},
55	callbacks: {
56		async signIn({ user, account }: SignInParams) {
57			if (account.provider === "google") {
58				const existingUser = await prisma.user.findFirst({
59					where: { email: user.email },
60				});
61
62				if (!existingUser) {
63					await prisma.user.create({
64						data: {
65							name: user.name,
66							email: user.email,
67							avatar_url: user.image,
68							password: "",
69							is_active: true,
70						},
71					});
72				}
73			}
74
75			return true;
76		},
77	},
78};
79
80const handler = NextAuth(authOptions);
81export { handler as GET, handler as POST };
It's worth noting that some parameters were typed based on the user model chosen for this application. However, this typing may vary depending on the specific project.
In the providers key, we need to provide an array containing all the allowed authentication providers for the application. In this example, credential-based authentication was also included using the CredentialsProvider, which is responsible for receiving the email and password and validating whether those credentials already exist in the database.
Note: Although it hasn't been implemented in the code, this section is where you could add logic to check whether the user is active—meaning they clicked the verification link sent via email after creating a new account.
In callbacks, we can control certain actions, as shown in the example above, where we create a new user if someone tries to log in using the Google provider and that email doesn't yet exist in the users table.
With everything configured, you just need to trigger next-auth on the client side:
const router = useRouter();

async function handleSubmitForm(formValues: z.infer<typeof formSchema>) {
	try {
		const response = await signIn("credentials", {
			email: formValues.email,
			password: formValues.password,
			redirect: false,
		});

		if (!response?.ok) {
			throw new Error(response?.error as string);
		}

		router.push("/app");
	} catch {
		alert("Invalid credentials!");
	}
}

async function loginWithGoogle() {
	await signIn("google", { callbackUrl: "/app" });
}
The client-side configuration is quite simple: just call the signIn method, specifying the provider and an options object (if needed).
This way, when one of these functions is triggered, the user will be authenticated and redirected to a route that only authenticated users can access. This will be covered in the next topic, where the user's session will be validated using Next.js middleware.
User authentication validation with middleware
To use middleware in Next.js, simply create a file named middleware.ts inside the src directory. The following file was created to validate user authentication:
1import { NextResponse } from "next/server";
2import type { NextRequest } from "next/server";
3import { getToken } from "next-auth/jwt";
4
5const LOGIN_OR_SIGN_UP_ROUTES = ["/login", "/sign-up"];
6
7export async function middleware(request: NextRequest) {
8	const token = await getToken({ req: request });
9
10	const { pathname } = request.nextUrl;
11
12	if (token && LOGIN_OR_SIGN_UP_ROUTES.includes(pathname)) {
13		return NextResponse.redirect(new URL("/app", request.url));
14	}
15
16	if (!token && pathname.startsWith("/app")) {
17		return NextResponse.redirect(new URL("/login", request.url));
18	}
19
20	return NextResponse.next();
21}
22
23export const config = {
24	matcher: ["/app/:path*", "/login", "/sign-up"],
25};
To validate user authentication, simply use the getToken function from the next-auth package. If the user is authenticated, the function will return an object containing token information, allowing for efficient validation.
Conclusion
With this guide, you now have a complete and efficient authentication flow for your Next.js applications, whether through traditional email confirmation or using OAuth 2.0 providers like Google. I hope this content becomes a truly useful reference for you to consult whenever you need to implement authentication, making this part of development simpler, more secure, and well-organized in your projects.